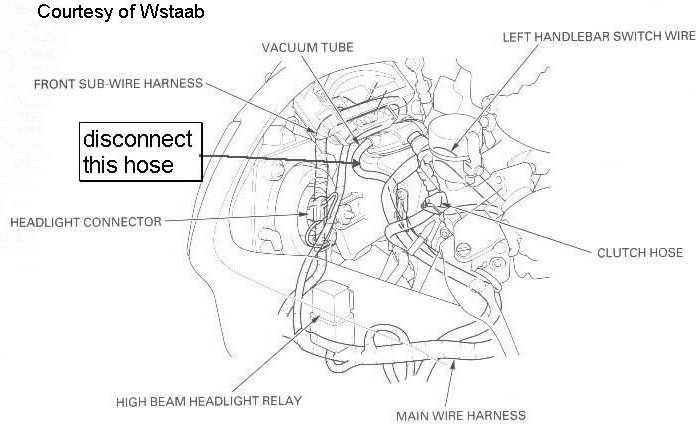
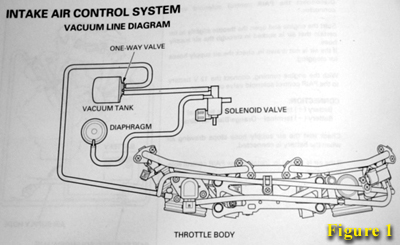
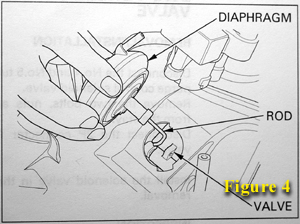
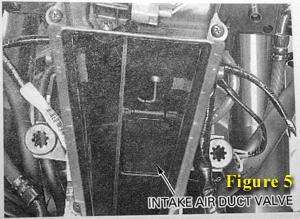
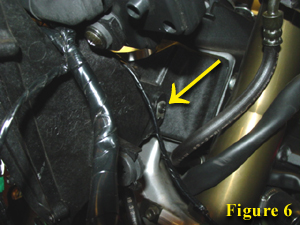
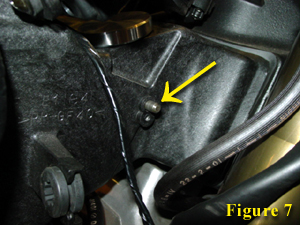
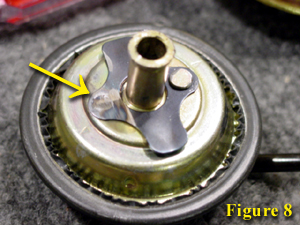
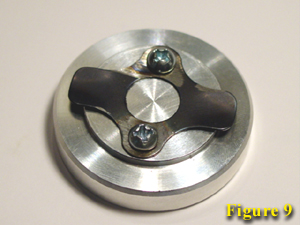
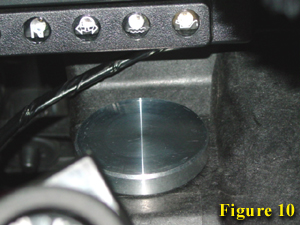
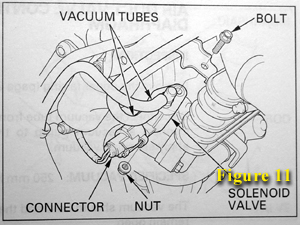
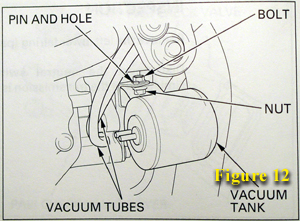
Many of you have complained about the dip in power between 5000 & 7000 rpm & others like myself have had an annoying fueling glitch (hiccup) at 6800 rpms especially with the Moriwaki's & a good map installed, although all the bikes are affected by the flapper valve, certain exhaust & map combos highlight this problem. Bill Staab has found a solution! (and wrote most of what you are about to read...)

By disconnecting the vacuum line to the flapper valve in the air intake duct you can completely eliminate the hiccup at 6800 rpm & reduce the power dip we have all seen on the dyno runs between 5000 & 7000 rpm.

As the flapper valve is an air intake noise control device which is not used on the basic racer, but rather only on the street legal bikes where noise levels are monitored by the EPA. It is advised that you only do this mod to "race only" bikes.

Having gotten the legal disclaimer out of the way let's get back to the flapper valves function. The valve is partially responsible for the power dip between 5000/7000 RPM. The flap is normally open. If you disconnect the vacuum line it will always stay open. You can remove the flap if you like. although it shouldn't make much difference with the stock air box. The HRC and Moriwaki air boxes have a larger duct with no flap for the race motors. The flap closes at about 5500 rpm which reduces the intake duct about 65%. It opens back up about 6700 rpm. This is done to reduce intake noise on the road bikes. The mod is done by simply disconnecting the hose at the diaphragm switch & plugging the hose with a screw,bolt or whatever you find handy or aesthetically pleasing.

Diagram below


Instructions courtesy of Troy Gwin

This guide will show you how to remove the entire Intake Air Control System (Flapper Valve System.) The parts removed will included the vacuum tank, solenoid valve, diaphragm and hoses pictured in Figure 1. We will also remove the Intake Air Duct Valve assembly pictured in Figure 5.  
     
To begin, remove the upper fairing. Then disconnect the BARO sensor connector and remove the four screws along with the intake duct A (Figure 2).  

     
Next, remove the vacuum tube from the air duct valve control diaphragm (Figure 3). We'll be throwing this tube out in a few minutes.  

     
Turn the diaphragm counterclockwise and remove it from the air intake B. Unhook the diaphragm rod from the air duct valve and remove the diaphragm (Figure 4).  

     
Now we can remove the Intake Air Duct Valve or Flapper (Figure 5).

Begin by removing the screw and plug in Figure 6.

Next, remove the valve pin by wiggling the Intake Air Duct Valve (the bike must be on it's side stand for the pin to fall out (Figure 7).


Now it's time to modify the diaphragm. The new diaphragm replacement can be purchased from Dan Kyle Racing (831) 394-1330 for approximately $20. I prefer his replacement cover as it used the stock retainer to hold it in place.

Just grind off the studs that are holding the clip in place by using a bench grinder or hand grinder (Figure 8). Then attach the clip to the new cover provided by Dan Kyle (Figure 9).


Finally, reinstall the diaphragm replacement cover in a clockwise motion until it comes to a complete stop. (Figure 10)

Now we'll move on to the Solenoid Valve removal. Remove the right radiator (or at least loosen it enough to get behind it a bit.)


Now disconnect the connector and vacuum tubes from the solenoid valve (Figure 11). Remove the mounting bolt, nut and the solenoid valve from the stay. Both these tubes can now be discarded.  

     
To remove the Vacuum Tank, first disconnect the vacuum tubes from the tank. Then you are free to remove the mounting bold, nut and the vacuum tank from the stay (Figure 12). The vacuum tube that was connected to the solenoid can be discarded, but the other tube (which is connected to the throttle body) needs to be plugged. A small screw works good for this.  


(C) 2001 www.rc51.org ROGUE