|
So
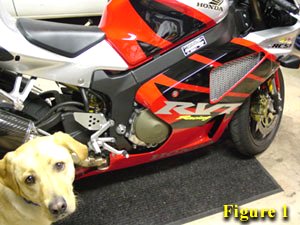
the project begins--with my faithful companion looking at
me and thinking, "You better not mess up...Hole Saws
aren't forgiving (Fig. 1)!" To start off with you'll
need: - Frame Sliders - A small drill bit (for the pilot holes) - A 2" Hole Saw - A can of "Play Doh" (just trust me on this one) - (2) 17mm sockets with extentions - Masking tape - Dremel Tool with sanding drum (optional) - Black Sharpie Marker - Torque Wrench |
|
| One
last look at the panels before we get started (Fig. 2).
Do I really want to cut holes in these...YEAH! Start by removing the side panels off your bike. |
|
|
|
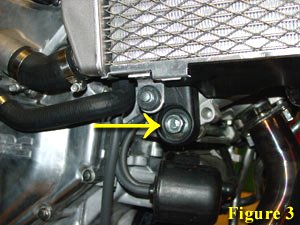
Next,
remove the nut from your "through bolt" with a
17mm socket (Fig. 3). It's on pretty tight so you'll have
to put a little effort into it. Once the nut is off,
place it to the side (you'll be using it later.) You
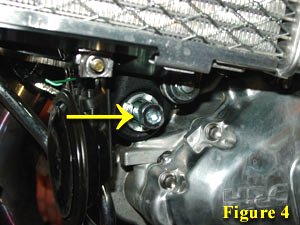
won't need the washer. Now tap on the bolt to push it out the other side. Then grab the bolt (Fig. 4) and pull it out. |
|
| Now tap on the bolt to push it out the other side. Then grab the bolt (Fig. 4) and pull it out. |
|
|
|
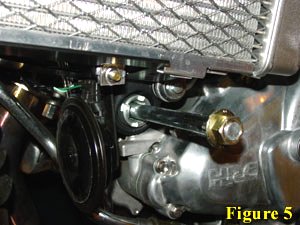
Replace the stock bolt with the bolt that came with your Frame Sliders (Fig. 5). Do not put the left slider on the bolt yet. Now push the bolt in just far enough so that it would touch the inside of your side panel if you put it on. | |
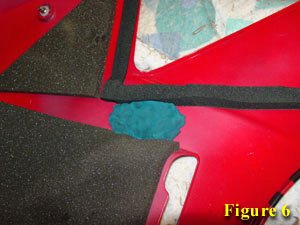
| Next, place some Play Doh on the inside of the left panel--approximately where you think the Framer Slider is going to poke through (Fig. 6). |
|
|
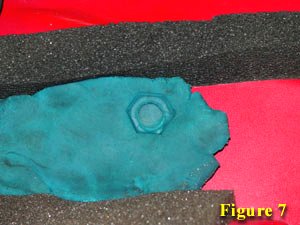
| Place the left panel back on the bike and then remove it. The bolt will make an impression in the Play Doe right where you need to drill (Fig. 7). |
|
|
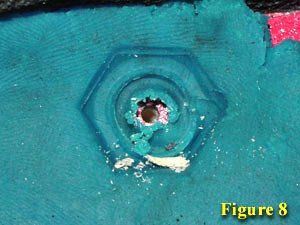
| Now use your small drill bit and drill a pilot hole right through the center of your bolt impression (Fig. 8). It helps to place a block of wood under the side panel to drill in to. |
|
|
|
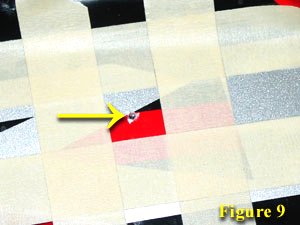
Now
flip it over, tape it off, and get ready to make your cut
using the pilot hole you just drilled (Fig. 9) Using your 2" hole saw, begin drilling through the panel. You must drill the hole from the outside in order to get a smooth entry into the plastic (and not push the decal stickers from the backside) |
|
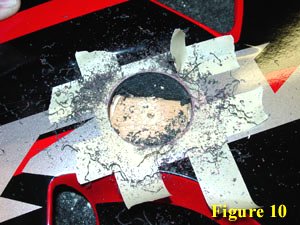
| DO NOT drill the hole at a high rpm! It will create heat and melt the plastic! Nice and steady...firm pressure. Don't forget the wood block under the body panel. Ahh, finally! Hope the whole is in the right spot (Fig. 10). |
|
|
|
Use
your Dremel to 'debur' the edge of the hole. Be gentle
and take your time. You want the rotation of the sanding
barrel to be 'pushing' downward into the hole in relation
to the edge you are sanding for the same reason you
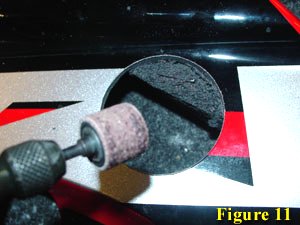
drilled from the outside (Fig. 11). You can also use a black Sharpie marker to finish the inside edge of the hole. It covers all the little blemishes |
|
| n order to get rid of the foam rubber, that's sticking out in the whole, you'll need to pull out little bits of it. Cutting it didn't work well so I just pinched out small pieces with my fingers (Fig. 12). |
|
|
|
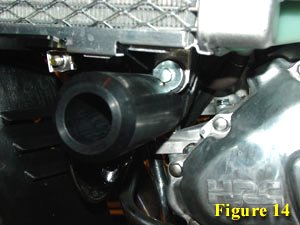
Now remove the bolt from Fig. 5, place the longer Frame slider on it, followed by the small spacer that was provided, and then re-install the bolt (Fig. 14). The other side of the bolt should be left sticking out on the right side | |
|
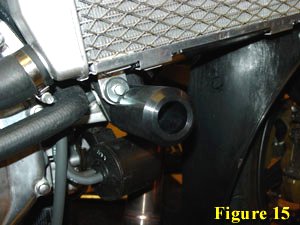
Now repeat the Play Doe and drilling process for the right panel. Then install the right Frame Slider using the factory nut (Fig. 15). Torque the nut to 47 ft. lbs. You'll need to use the (2) 17mm sockets to hold the bolt in place and torque the nut down | |
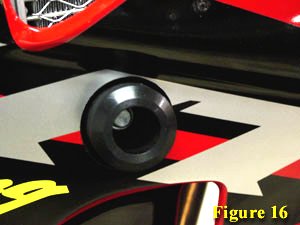
| Finally, put the panels back on and admire your handywork (Fig. 16) |
|
Guide by Troy
Gwin.
Adapted from instructions on the Intuitive website:
http://www.inturace.com/